Friday, July 30, 2010

BBD #32: Ciabatta bread

Andrea over at Family & Food is hosting this month's Bread Baking Day (BBD) #32, and she chose Italian bread for her theme.

Knowing we would be out of town for most of July, I tried to find a recipe that could also fit into one of my other Challenges. But . . . no such luck!

So instead, I thought back to one of my most challenging breads from the BBA Challenge: ciabatta. I struggled a ton with that recipe and especially the very very wet dough. I couldn't figure out the stretch and fold, couldn't get the pretty golden color, and couldn't get any holes. This was a MAJOR problem because ciabatta is one of hubby's very favorite breads. Back in the old days (before last year) when we purchased "artisan" bread from the store, he would always pick ciabatta.

At first, I was going to re-attempt the ciabatta recipe from the BBA, now that I'm more experienced with high hydration doughs. But instead, I decided to try the recipe in Artisan Breads Everyday, P. R.'s newest book.

Last night, having just walked in the door from a two+ week trip to visit my in-laws, I immediately refreshed my starter and started the ciabatta going . . . Do I have a problem?!

The recipe was easy: mix bread flour, salt, instant yeast, and chilled water in a bowl and then let sit. Drizzle olive oil over the top and then mix with the paddle attachment for one minute. Dump it into an oiled bowl, give it four stretch-and-folds over the course of an hour, and stick it in the fridge. It was a perfect recipe for a night filled with unpacking and doing laundry. And I had to laugh at my last year's self: while this was a wet dough (just like when I made it for the BBAC), it was nothing compared to the pasty goo I dealt with when I made the Mellow Bakers' 70% rye earlier this month!

P.R. says the ciabatta dough should be at least 1 1/2 times its original size after its overnight rest. When I pulled it from the fridge this morning, it had easily doubled, and when I got home after 1 1/2 hours of errands (I was only supposed to let it sit for an hour), I saw this:

Eek!

I used P.R.'s suggested variation of mixing a little whole wheat flour in with the bread flour for dusting. Then I carefully dumped the dough onto the board, divided it in three to make three small loaves, and shaped it. Again, I can't believe how much easier it was than last time!

The only problems I encountered were that in their final rising times, the loaves grew into each other, so I had to very carefully separate them. And then when I went to put them into my preheated oven, I realized that only two loaves would fit, so the third had a bit of extra time sitting on the counter. I steamed them and then lowered the oven temperature. P.R. says to cook them for 27 - 30 minutes, but mine were over 205 F after only 15 minutes.

As for the results? I'll let the pictures speak for themselves. (Well, the pictures and the fact that hubby and the baby girl have already polished off the first loaf while I typed up this post . . . .)

Here is my first attempt at ciabatta:


And today's results:
 Success!

Sunday, July 18, 2010

The cinnamon roll experiment: The final chapter


Needing to make dozens of cinnamon rolls and transport them across the country for my sister-in-law's day-after-wedding brunch, I solicited the advice of my fellow Mellow Bakers and Frieda (from Frieda loves bread). Several weeks ago, I tried a couple of different techniques for making and freezing the rolls ahead of time, and then hubby and I had a taste test and made a plan.

In my research on freezing and transporting food, I read that it's important for the food to be frozen for two days prior to transport. So last weekend, I made two double-batches of P.R.'s cinnamon rolls from the BBA and filled them with melted butter, cinnamon, and brown sugar. I purchased a bunch of disposable aluminum pans and placed 6 or 7 rolls in each one. The quadruple recipe made eleven trays (8" rounds).

Each tray was double-wrapped with plastic wrap, wrapped once with aluminum foil, and then placed into a jumbo zipper bag. We stuck the bags in the deep freeze in the basement.

The morning we were headed out of town, hubby placed the wrapped trays in our best cooler and drove immediately to a supplier of dry ice. They were very helpful, talked to hubby about our plans, assured us that 10 pounds of dry ice would be sufficient, and sold the pack to us for $10. We put the dry ice on top of the stack of trays; a few trays wouldn't fit underneath the ice, so we placed them sideways in the cooler. Then we shut the cooler tight and didn't open it for 36 hours as we drove across country.

When we arrived at my in-laws, we barely took time to say hello before opening the cooler. The trays that had been under the dry ice were still frozen completely solid. We transferred them immediately to my in-laws' deep freeze. The trays that were along side of the dry ice were slightly defrosted. We debated and debated . . . and eventually my mother-in-law convinced me to stick them into the deep freeze, too, and see what happened.

Last night, I removed the plastic bags and put the trays into the fridge. This morning, I took the rolls out of the fridge, removed the foil and one layer of plastic wrap, and let them rise on the counter for about three hours.

Then into a 350 F oven for the usual 23 minutes.

I glazed them slightly after cooling with my usual glaze (6 tbsp unsalted butter, 1/2 cup half-and-half, 1/4 tsp kosher salt, 2 tsp vanilla, and enough sifted powdered sugar to make it drizzle-able). Once the glaze was slightly hardened, I carefully separated the rolls and put them into a parchment-lined basket, just in time for the guests to arrive.

The verdict? Just about as good as fresh cinnamon rolls, these met with rave reviews. And with the exception of the worry about whether or not the whole experiment would work, it was pretty darn easy! My brand-new brother-in-law even said that they may be the best cinnamon rolls he's ever tasted!


To review:
1. Follow recipe to make the cinnamon rolls up to two months in advance.
2. Fill and slice cinnamon rolls and place them into pans.
3. Wrap each pan with a double-layer of plastic wrap, a single layer of foil, and place in a zipped plastic bag. (I'm not sure all of these precautions are really necessary, but I didn't want to take any chances!)
4. Stick into the freezer until ready to use.
5. If transporting, place the wrapped pans into a cooler, and be sure that all trays stay directly under the dry ice. When planning for the dry ice, we were told we'd need 5 pounds per 24 hours of keeping the food cold. Place into freezer upon arrival.
6. Move trays from freezer into fridge the day before you plan to bake.
7. Allow trays to sit out at room temperature for 3-4 hours before baking.
8. Bake, glaze, and enjoy as usual!

Sunday, July 11, 2010

Mellow Bakers: 70% rye with rye soaker and whole-wheat flour

AKA Humble Pie

One of my favorite things about my new hobby is that there is so much to learn. Every time I feel like I've gotten a handle on this bread-baking thing, I understand what is going on with the dough, I can bake a loaf of bread while making dinner, a bread comes along to make me remember how much I still have to learn. This was one of those breads.

*****
For the rest of July, my family will be focused on spending time with my in-laws and enjoying my sister-in-law's wedding, so I had to rush to complete my three Mellow Bakers' July breads in the first twelve days of the month. (I know that doesn't sound very mellow, but I'm really not a very mellow person, so . . . .)

After reading Oggi's review of my third bread for July, 70% rye with rye soaker and whole wheat flour, I was much more excited to make it. She talks about using it to make cucumber open-faced sandwiches . . . I love those!

At night, I made the sourdough with a bit of my Austin, some rye flour, and water. I really wanted to refresh Austin a few times before I started this bread, but never got around to it, and really needed to get this bread going, so I only refreshed him once. I don't know if it was supposed to rise or move, but as with the 100% sourdough rye from the BBA, this did nothing. I don't know if getting Austin a little more active would've helped matters or not . . . it's certainly warm enough here.

I also made my soaker. Like many of my fellow Mellows, I couldn't find rye chops, so I purchased rye berries, and ground them coarsely in hubby's coffee grinder. These I mixed with water and also let them sit out overnight.

The next day, I mixed everything together: whole wheat flour, instant yeast, salt, soaker, sourdough, and water. This was not dough; it was porridge. My standmixer would do nothing with it; the dough hook just whirled on the surface. So I did a little kneading by hand, attempted a stretch-and-fold, and let it sit for 30 minutes. Sticky, globby mess.

The pan was another issue; I don't have a pullman pan. I checked the volume for the pan in the book and compared it with the volume of each of my loaf pans. Nothing came close, except for using two of my 8x4 pans, so I prepared those. When it was time to dump the dough into the pans (there was no chance of shaping these into logs!!!), the dough filled the pans less than half-way, and I remembered people talking about how these loaves didn't really rise. So I changed my mind, used my giant 10" loaf pan, filled it about two-thirds of the way, and then threw away the small bit of dough that was left.

And then I got another surprise . . . within ten minutes, the loaf had already risen to the top of the pan. Hm, what to do? Nothing to do but wait and see. In the fifty-minute rising time, the dough crested the pan, but didn't grow an insane amount, so that was a relief.

Then into the oven. I baked it for ten minutes with my aluminum roasting pan over it, then for another 35 minutes. At that point, I was supposed to take it out of the pan and finish cooking it on a sheet pan, but it was already registering 203 F in the center, so I just pulled it out of the oven. It hadn't risen at all in the oven.

And then a 24-hour rest.

****
This morning, we sliced it open. We were just short of 24 hours, but hubby and I were both feeling a bit snackish. This is a dense, chewy, nutty bread. The rye and sourdough flavors are both quite distinct, and I like the added chew from the rye berries. I'm surprised by how much hubby likes the bread, given that he's usually a French bread or ciabatta type, but he thinks it will make really good toast. And I have a cucumber on the grocery list to try that yummy cuke sandwich!


Bialys are still my favorite July bread, hands-down, but this one is pretty good, too! Check out the fellow Mellows' fabulous July breads here!

Saturday, July 10, 2010

Modern Baker: Devil's food cake


Knowing how busy this school year will be, if I need to bake something sweet, I try to grab a recipe from Nick Malgieri's Modern Baker, even if it's not from the section we're technically on. I figure I need to get a head start if I'm going to have a chance of baking most of the recipes from the book for our Modern Baker Challenge.

So this weekend, I needed a multi-purpose cake to celebrate my nephew's fourth birthday (it's his second birthday party, so not his main cake), my stepdad's sixty-fifth birthday, and my mom and stepdad's anniversary. My sister requested chocolate, so I went browsing through the cake section of the book. There were a few chocolate recipes, but upon investigation, I realized that I only had unsweetened chocolate in my house (very uncharacteristic for me), which was the chocolate called for in the devil's food cake recipe. I remembered that Andrea (at Family and Food) had made this cake when she received the cookbook, so I read her notes: the frosting was too sweet and too much, but overall, a tasty cake.

I didn't want a giant cake with tons of leftovers, as everyone in the family is trying to eat more healthfully. I decided to make a half-recipe, cut the one layer in half, and just make a shorter cake.

The recipe was easy enough ~ not nearly as easy as the quick breads (the section we just finished), but not too complicated. Mix dark brown sugar with softened butter and vanilla. Add eggs and melted chocolate. Then mix in the flour mixture, alternating with milk, and mix the whole thing for a few minutes. I poured the batter into my prepared pan and cooked it for 25 minutes. When I took it out of the pan . . . it was tiny. Only about an inch thick, maybe . . .? Definitely not big enough to split in half horizontally. Hm.

So I decided to cut the cake in half vertically and make half of a layer cake. Remembering Andrea's notes about the frosting, and knowing that egg white and sugar-based frostings aren't my favorite anyway, I decided to try Nick Malgieri's variation which is listed under the recipe. I made a third of his simple whipped cream recipe (heavy cream, sugar, and vanilla) and macerated some strawberries, which I put in between the layers and on top of the cake. Once I put the whipped cream on top, I really liked the unfinished look of the cake, without the sides frosted, so I left it. Guess it felt arty to me. ;)

And then I showed up to the party and found that there were many more guests than we'd expected. Argh! Why didn't I make a whole cake?! Nevertheless, I cut the cake into thin slivers and served it with ice cream. It met with rave reviews. Hubby called it "the best devil's food cake I've ever had."

Wednesday, July 7, 2010

Mellow Bakers: French bread (July)


This is one of my hubby's favorite kinds of bread, so I was excited when I read Hamelman's recipe for French bread, one of the Mellow Bakers' July breads, and saw that this was a quickie: indeed, I started mixing at 12:30 this afternoon, and we were eating supper by 6:00 tonight.

This was a pretty easy recipe, although not everything went as planned.

I mixed the bread flour, water, salt, and yeast briefly, as Hamelman instructs, and then let it proof while folding the dough every 50 minutes. It is so hot here that the second and third folds happened at closer to 40 minute intervals because the dough had risen so much, it was threatening to escape its container.

I then divided the dough into three 250 g pieces (I only made half a recipe, knowing that French bread generally tastes best on the first day, and there was no way we could eat even three baguettes). Following this video that Paul posted made preshaping and shaping so much easier!! I have a really difficult time following the lengthy instructions in the book, so I liked being able to watch while I was shaping.

Then the baguettes rose for another 90 minutes while I preheated the oven. On pg. 76 when Hamelman explains how to shape a baguette, he says "Since the best volume (and arguably the best flavor) is achieved when baking is done directly on the floor of the oven...." So I put my pizza stone on the floor of the oven, and baked the baguettes right on it. This turned out to be a mistake, as the bottoms burned.

We still scraped off the burned bits and ate an entire baguette with our soup for dinner. This was the other odd thing: the bread was really salty. I even went back to check my notes and make sure that I hadn't forgotten to cut the salt when I was halving the recipe, but no, I'd measured correctly. It wasn't so salty that we couldn't eat it, but it just tasted a little odd.

So I don't think we'll be making this one again. I certainly preferred the French bread, Italian bread, or pain à l'ancienne from the BBA. But I felt like it was a great learning experience, and you can't complain about that! And anyway, have you noticed how even the worst home-baked bread (and this wasn't in that category!) generally tastes about a million times better than the best store-bought loaves?


Check out the other Mellow Bakers' French breads here!

The cinnamon roll experiment

My sister-in-law is getting married in a couple of weeks, and my mother-in-law asked me to help bake for the Sunday brunch on the day after the wedding. I am happy to, of course, and have been thinking about how to get most of the work done ahead of time . . . the complication: my in-laws (where the wedding will take place) live a 19-hour drive away.

I asked for help on our Mellow Bakers forum, and was pointed over to Frieda's website and her post about brown-and-serve rolls, which multiple people have tried with success. Frieda's recipe is for making dinner rolls ahead of time, parbaking them, storing them in the fridge for a week, and baking them before eating.

I needed to make cinnamon rolls a few weeks ahead of time, freeze them, and then bake them. I made a double-batch of the BBA cinnamon rolls for our end-of-school breakfast, and held six rolls back. I had a couple of disposable aluminum pans in the cupboard, so I shaped the cinnamon rolls and then placed three in each pan. For one pan, I wrapped it well in plastic wrap and then aluminum foil, and then put it in a zip-top bag and stuck it in our deep freeze.

For the other pan, I used Frieda's instructions as a guide, parbaked the rolls at 300 F for 15 minutes, then let them cool, wrapped them, and put them in the deep freeze.

Last night, we moved both pans into the fridge to thaw overnight. Four hours before baking, I pulled the raw rolls out and put them on the counter; two hours before, I put the parbaked ones on the counter. I baked them both at 350 F, the parbaked ones for 15 minutes and the raw ones for 23 minutes.

And the results (parbaked on the left, frozen raw on the right):


I was surprised by how different the two sets of rolls looked; I think the parbaked ones (on the left) look neater and tidier. Taste-wise, they would both be very acceptable to serve and people would be delighted with them; clearly, either method works. Evaluating the texture more closely, I think the parbaked ones taste like they were reheated day-old cinnamon rolls, while the frozen raw ones taste like fresh-baked, just out of the oven cinnamon rolls. Which is good because that method is certainly the easier of the two.

So this weekend, I will be assembling trays of cinnamon rolls and then packing them into the deep freeze before we head out west next week. And we'll see how the experiment does when taken on the road!

Sunday, July 4, 2010

Mellow Bakers fail? Bialys (July)


I've spent a ton of time in New York (my parents' birthplace) throughout my life, and every trip has included trips to various NY bagelries. I always saw bialys, but never bothered to try them, having my heart set on a New York bagel.

So I was really excited to see them on the Mellow Bakers' list for July, especially since they are a quick (and delicious-looking) bread!

Likening bialys to bagels, I wanted to have these ready for the family's breakfast . . . but I was not really prepared to wake up at 3:30 or 4:00 a.m. to make that happen.

So in the evening, I mixed my flour (Hamelman calls for high-gluten, but I mixed bread flour with a little vital wheat gluten), yeast, salt, and water with my dough whisk until it all came together. Like bagels, this is an extremely stiff dough, and it gave my stand-mixer quite a workout! In six minutes, it looked properly developed, so I transferred it to an oiled bowl, where it easily doubled in its first hour (then a stretch-and-fold) and again in the second hour.

While the dough was in this stage, I worked on the onion topping. Hamelman suggests ground onion mixed with bread crumbs, and allowing the two to "visit" (love that term!) for several hours. Anne Marie suggested that a previous recipe she'd made that used caramelized onions had a better oniony flavor, so I ground my onions, cooked them over relatively high heat for five or so minutes in a bit of olive oil, and then mixed them with the bread crumbs, a sprinkling of salt and pepper, and a teaspoon of minced garlic.

After the dough had risen for its second hour, I divided it into 3-ounce pieces and rolled them into tight rounds. These I place on a jelly roll pan covered in flour, covered it with plastic wrap, and stuck it into the fridge for an overnight rest.

This morning, I got up, preheated the oven, and took the pan of rounds out of the fridge (they had clearly doubled overnight). Paying attention to Paul's comments that his bialys puffed up so much in the oven that the holes nearly filled in, I made a special effort to make the depressions in the center of the bialys extra large, and then I dumped a teaspoon full of the onion mixture into each. I baked them for 6 minutes, rotated the pans, and baked them for another 6 minutes. And then I pulled out . . . this?!?


Maybe the problem was that I didn't let them come to room temperature before I baked them?

As you can see from the top photo, a couple of them came out looking as they should. And the odd shape certainly didn't make the family like them any less:


We loved them warm with butter, and at least half of them are already gone. Hubby says that because they're lighter than bagels, you can eat more without feeling guilty (hee hee). We will absolutely be making these again. Hubby, always ready to be creative, actually used the odd shape to his advantage: filled each hole with the extra onion/garlic mixture and then buttered the sides:


For other Mellow Bakers' (more successful) bialys, check here!

Friday, July 2, 2010

Modern Baker Challenge: Fougasse


In order to create a low-stress challenge, Phyl (over at Of Cabbages & King Cakes) created the Modern Baker Challenge so that we would have three months in which to bake as many recipes out of one section of Nick Malgieri's The Modern Baker as we can/want to. We just finished the first section, Quick breads, assigned April through June. Our next section is Breads, grouped into four types (flatbreads, pan loaves, free-form loaves, and rolls) assigned July through September.

As with the quick breads, we each had a chance to choose a bread to blog about; there were a lot in this section that looked tasty (pita bread, instant sandwich bread, seven grain bread, prosciutto bread, and many more). I eventually settled on one that I'd never heard of before: fougasse (pierced French flatbread), found on page 74. Nick Malgieri writes, "a fougasse is a unique flatbread that is pierced through to the bottom in a series of slashes to increase the quantity of the crust."

Nick Malgieri gives several intriguing variations: whole-grain, bacon, rosemary, olive, cheese. The recipe makes two fougasse; I planned to make one plain and one with bacon and cheese. Unfortunately, the leftover bacon that was in the fridge wasn't good anymore, so I halved the recipe and just made one plain fougasse.

It started simply enough, with active dry yeast whisked into warm water, and then an addition of olive oil. In a separate bowl, I combined all-purpose flour and salt; then added this mix by cupfulls into the liquid. The instructions say to use a large rubber spatula to stir the flour in and beat for a few seconds until smooth. I wasn't sure if I was supposed to use my paddle attachment on my stand mixer to beat it, or the spatula, or . . .? So I just mixed it with my dough whisk, and it seemed to work just fine.

Once all of the flour was incorporated, I let the whole thing autolyse for 20 minutes. Then I dumped it onto a board, kneaded it a few times, and put it in an oiled bowl to rise. The suggested time is one to two hours. It is so hot here, even with our a/c running, that the dough had more than doubled in forty minutes; thinking back, I probably should've decreased the amount of yeast used.

I gently dumped it back onto my board and stretched it into a triangle, then folded it in thirds and transferred it onto a pan. I used a pizza wheel to cut seven slashes into the bread, let it rest for ten minutes, pulled it gently out a couple more inches, brushed it with olive oil, and then let it rise for another hour.

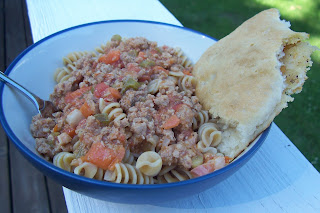
I baked the fougasse for twenty minutes, while reheating our favorite spaghetti sauce (a bolognese) and making some pasta. I also heated up some butter and added some frozen roasted garlic and a bit of salt and pepper.

Once the fougasse came out of the oven, I cooled it for a few minutes, then broke it in half. One half, we left plain. I cut the other part in half, and spread the garlic butter mixture on it, to make a quick garlic bread.


The verdict? Plain, this was a quick, tasty bread. I think it took three hours from mixing to eating. And it's convenient to have a recipe for a French-type bread that uses active dry yeast and all-purpose flour (especially if I were someone who didn't always have bread flour and instant yeast on hand). Hubby described it as tasting like a normal French bread, but with a coarser texture, much more crust and more crumbly. It was good plain, but hubby discovered the ultimate: he took the make-shift garlic bread, filled it with the bolognese, and ate it as a sandwich. Yum!

Thursday, July 1, 2010

Modern Baker: Quickbread Recap

The Modern Baker Challenge (baking through Nick Malgieri's The Modern Baker) assigns three months to each section of the book. Some people are baking through every recipe, others are just baking as many as they can.

I'd really hoped to bake most - if not all - of the recipes in our first section (quick breads). However, with the crazy pace that comes with the end of the school year, combined with finishing the BBA Challenge and keeping up with the Mellow Bakers, I ended up only baking about half of the recipes. Hopefully I'll get to the rest of them at some point!

Part of the problem may have also been the butterscotch scones . . . I made those so frequently that they got in the way of making anything else! Cheesy

Anyway, here's my summary of the first three months:

Will make again!

Might make again

Still need to try
1. Fennel fig and almond bread, p. 42
2. Whole wheat currant bread, p. 46
3. Date walnut bread, p. 47
4. Spicy jalapeno cornbread, p. 50
5. Ginger scones with almond topping, p. 54
6. Irish soda bread muffins, p. 59
7. Sweet rusks for dunking, p. 62

Next up: Breads (July - September). My official bread for this section is Fougasse: Pierced French Flatbread, so stay tuned!