Showing posts with label Virtual parties. Show all posts

Sunday, December 16, 2012

Mint chocolate brownie cookies (Virtual cookie exchange)


Winter appeared with a bang last weekend, dumping about 14 inches of snow on us by bedtime on Sunday. Great fun for the kids; not so fun for us, especially living in the frozen tundra where they don't cancel school for a measly foot of snow.
School may not have been canceled, but the weather took its toll on the roads. It took my husband 90 minutes to travel home from work, a drive that usually takes 30. As for me, I was standing on the corner, waiting for my kindergartener's bus, in 19 degree weather, with a little girl who suddenly had to go potty. We stood freezing and waiting and worrying (and her, after a while, crying and dripping wet) for 45 minutes.
By the time we got home with our tired boy in tow, Mama needed a glass of wine. Or a brownie. Or a massage. Or all of the above, times 10.
I'm not actually a drinker, so instead I started browsing for a quick chocolate pick-me-up treat. I stumbled on these brownie cookies from KAF, and they looked like just the thing. The little girl washed up, and we got to work.

I had picked up some Andes mint chips the other day, and since chocolate and mint is one of the best combinations ever, I decided to doctor the recipe just a tad.
I'm not sure I'd describe these as brownies, but they definitely aren't like a regular cookie, either. They've got the most marvelous fudgy texture with a crackly top, and the family and I found them completely irresistible.
My friend Di is hosting her annual virtual cookie exchange today, and I'm happy to bring these along to the party. They come together quickly, and will improve your mood, whatever Mother Nature throws at you.

Mint chocolate brownie cookies
barely adapted from King Arthur Flour
8 oz bittersweet chocolate (I used a quality 70% 4 oz bar and 4 oz of semisweet chocolate chips)
1 1/2 oz unsalted butter
7 1/4 oz sugar
3 eggs
1 tsp espresso powder
1 tsp vanilla
4 1/4 oz all-purpose flour
1/4 tsp baking powder
1/4 tsp salt
3 oz mint chips
3 oz chocolate chips
1. Melt the chocolate and butter together in the microwave in 30 second increments, stirring after each, until the butter is melted and the chocolate is almost melted. Stir until the chocolate melts completely.
2. Beat the eggs and sugar in a mixer until combined. Add the butter/chocolate and beat until thoroughly mixed.
3. Use a spatula to gently mix in the rest of the ingredients.
4. Put the batter in the fridge for 30 minutes. (I actually left some in for a couple of days so we could bake a tray whenever we wanted.)
5. Preheat the oven to 325.
6. Drop the cookies in tablespoon-sized balls onto a pan covered with parchment or a baking mat. Bake for about 13 minutes, until the tops have some cracks or look set. Cool on the pan for 5 minutes and then remove to a cooling rack (or your mouth).


Saturday, August 11, 2012

Mint chocolate chip ice cream


Our final category for ice cream week is original recipe. I have to admit that I was not nearly as creative as Phyl (Guiness stout ice cream), or Margaret (tea and biscuit ice cream), or Rebecca (baklava ice cream), but this is one of our favorite ice cream recipes for my very favorite ice cream flavor: mint chocolate chip.

I start with Jeni's vanilla bean ice cream (can you sense a theme here?):
500 g 2% milk
13 g cornstarch
42 g softened cream cheese
1/8 tsp fine sea salt
312 g heavy cream
130 g sugar
22 g corn syrup
1 tsp vanilla extract
1 tsp peppermint extract
1/2 c mini chocolate chips

I follow Jeni's basic technique (see here), but leave out the vanilla bean and stir the extracts into the base at the end. After an overnight rest in the fridge, I churn it in my ice cream maker, adding the chocolate chips during the final two minutes of churning.

Next to rich lemon curd frozen yogurt (my favorite) and Jeni's vanilla bean with chocolate chip cookie dough (hubby's favorite), this is probably the most popular flavor at our house. Thanks to Phyl for an incredibly delicious and fun ice cream week! :-)

Wednesday, August 8, 2012

Ice cream week cones


Today's theme for Phyl's ice cream week is sorbet or other non-dairy frozen treats. I didn't make sorbet. But I didn't want to be left out. So I'm posting a non-dairy treat FOR frozen treats. :-)
A year ago, my friend Di posted about getting her own waffle cone maker and I became obsessed. Which is funny, because I have never liked cones; I always order my ice cream in a cup. But suddenly, waffle cones sounded soooo good and I began ordering them whenever we went out.
Finally, I decided to bite the bullet and use some of my remaining birthday money to buy a waffle cone maker. Well, after a lot of soul-searching ;-) and researching, I actually bought a pizzelle maker to use for waffle cones. The waffle cone makers come in 7-inch, which seemed huge for the kids, or 3-inch, which sounded too tiny to be worth it. Pizzelles are 5-inches, which seemed just about perfect. Plus my mother-in-law makes pizzelles each Christmas and I love her recipe (hint hint), so this way, I can make my own and I'm not spending money on a single-use appliance. Ta da!
I tried Jeni's recipe (Di posted it here). It was so much fun. I made cones and little bowls, and not only did we love them with ice cream, but they were amazing by themselves as cookies. I ate an embarrassing number by myself.
Check out Phyl, Rebecca, Margaret, and Di's actual sorbet/non-dairy frozen treat posts!

Tuesday, August 7, 2012

Triple citrus rich frozen yogurt


Today's ice cream week theme is frozen yogurt, and it's no surprise (to me anyway) that I did a new riff on an old familiar recipe.
The one recipe that I look up on my own blog over and over again is this one for rich lemon curd frozen yogurt. It uses the instant lemon curd from KAF in the lemon froyo recipe from Jeni's book, and there is just something about the bright lemon flavor and the incredible creamy texture that just captures me.... I am a chocoholic and normally won't even consider a non-chocolate dessert, but this is the one flavor of ice cream that I can't stay away from, continually sneaking into the freezer to have just one more small scoopful.
Before we went out West, I made a version in which I subbed in orange for the lemon. It was delicious and we ate it before I got any pictures, but it was definitely missing a little something.
Today, I was thinking about both the lemon and the orange froyo, and when I opened my fruit drawer, I ended up pulling out the lime, too. How about a three-citrus frozen yogurt?
Thinking about my discussions with Di yesterday about the unsatisfying non-fruitiness of many fruit ice creams, I decided to up the citrus flavor even more. I made 1 1/2 times my usual amount of curd, and used juice and zest from the three fruits. With the exception of a few spoonfuls "just to see how it tastes," I used it all in the yogurt. My ingredients were:
40 g egg
90 g sugar
45 g melted unsalted butter
60 g fresh orange juice (from one orange)
30 g fresh lemon juice (from one small lemon)
zest from a lime, a lemon, and an orange (a healthy pinch of each)

Then I followed my normal process for making the curd and the froyo, again using a pinch of all three citrus zests in the ice cream base.
I think I love this version as much as the original lemon. Our good friends are visiting from out East. Their comments were, "That's frozen yogurt?!?" and, "It tastes like really good lemon cheesecake." My hubby's addition: "And it will prevent scurvy!" ;-)

Monday, August 6, 2012

Happy ice cream week! Strawberry buttermilk ice cream


When my friend Phyl invited me to participate in ice cream week, of course I happily agreed. Ice cream is my favorite food group, after all! ;-)
Many of my Twitter buds started churning weeks ago, but with three weeks out West and a week at the cabin, I haven't spent much time in my own kitchen. Luckily, ice cream week was just the push I needed. Well, that and the pizzelle iron I just bought myself so I could make my very own waffle cones.
When I took requests for ice cream flavors to initiate our cones, the little girl picked something with chocolate (no surprise...she's my kid!) and the little guy picked strawberry ice cream. My little guy is a huge fruit fan (he calls himself a "fruitavore"), but he usually gets overruled by the rest of us. This time, I decided to make two flavors to make everyone happy.
To make it easier on myself, I made a double batch of base, adapted from Jeni's book:
1000 g 2% milk
624 g cream
260 g sugar
44 g light corn syrup
26 g corn starch
66 g milk
84 g softened cream cheese
1/4 tsp fine sea salt
(The method is here.) This made 8 cups of base. I took out 5 cups to use for the chocolatey treat (post Friday) and 3 cups to use for the strawberry ice cream. To the 3 cups of base, I added 1/4 cup of buttermilk and 3/4 cup of strawberry puree that was in my freezer, leftover from some other recipe.
The strawberry flavor really shone through, which is likely because I used much more puree than in previous recipes I've tried. This ice cream was a hit with both of my guys. Yum!


Sunday, May 20, 2012

"We bake cake and nothing's the matter!"

"Milk in the batter! Milk in the batter! We bake cake! And nothing's the matter!"
                                                        from In the Night Kitchen by Maurice Sendak, 1970


In September 2009, I decided I needed an official food blog to keep track of my progress in the BBA Challenge. I'd had a mommy blog for a while, and initially I thought I'd just post my baking adventures there, but after a few posts, I determined that I actually wanted a new space that was dedicated to talking and writing about food. At that point, my little guy was 2 1/2 and the baby was just over a year. My little guy had just started expressing an interest in helping me in the kitchen, and one of his favorite books at the time was one of my favorite books from childhood, In the Night Kitchen by Maurice Sendak.


When Di invited me to participate in her newest seasonal blog event, cooking the books, I immediately knew what I wanted to do. While I do, in fact, read cookbooks like novels, which is what inspired Di for this blogging event, I thought I'd use this opportunity to talk about my blog's name...something I've never written about.

"He kneaded and punched it and pounded and pulled
Till it looked okay."
                                                            from In the Night Kitchen by Maurice Sendak, 1970

Choosing a blog name is such a big decision (at least for me). In many ways, the name becomes your identity online, and even though it's possible to change it, it's likely that the name you choose is the one you'll have forever. Hubby and I debated and brainstormed for days, but I couldn't commit to anything. Finally, as hubby was reading In the Night Kitchen to the little guy one night, he looked over and said, "What about something from here?"

We liked that the book was about bread baking (kneading and punching and pounding and pulling), that it talked about cake making (milk in the batter!), and most importantly, that it reminded us of baking with the little ones. I am known around these parts for always getting lines just a little bit wrong, and while the actual line in the book is, "Stir it! Scrape it! Make it! Bake it!" I always read it, "Stir it! Scrape it! Mix it! Bake it!" Mix it Bake it was born. :)

So what to make? Well, "we bake cake and nothing's the matter!" and this weekend was definitely cake-worthy in our world: after seven years of hard work, my hubby finally graduated with his Master's degree this weekend. (It's not entirely his fault that it took so long; we've had two babies and multiple job switches while he's been enrolled in school, and these life events forced him to take several extended breaks.)


I wanted to make something special, and remembered Kelly's post for chocolate chip cookie dough cake which I'd bookmarked way back in October 2011. What a fabulous idea! And chocolate chip cookie dough ice cream is one of hubby's very favorite desserts. I was planning to make vanilla ice cream to accompany the cake, and then wondered if I could use ice cream to fill and frost the cake? Well, of course I could!

On Friday night, I made a batch of vanilla bean ice cream base from Jeni's Splendid Ice Creams at Home. I also mixed up some (no egg) chocolate chip cookie dough from my Ben and Jerry's Ice Cream and Dessert Book. Then Saturday morning, I made Nick Malgieri's yellow cake from The Modern Baker (a half-recipe made two 6" cakes). After the cake layers were cool, I stuck them in the freezer for a bit to firm them up. Meanwhile, I took the no-bake cookie dough and rolled them into little balls, which I also stuck in the freezer. And then I churned the ice cream.

Just after churning, while it was still the consistency of soft serve, I pulled the cake layers from the freezer and smoothed ice cream on top of both layers. On top of the middle layer, I buried pieces of the no-bake cookie dough. I sprinkled mini chips on the top of the top layer. Then I stuck the cakes back into the freezer to firm up again. (Of course I was doing this on a 90ยบ day!)

Finally I mixed up a batch of our very favorite chocolate chip cookie dough (from the America's Test Kitchen Family Cookbook) and used a teaspoon to make tiny little chocolate chip cookies, which baked for about 10 minutes.

On Sunday morning, I finished assembly: using some softened ice cream to frost the sides and then sticking the mini chocolate chip cookies along the sides for decoration. Voila!


Chocolate chip cookie dough ice cream celebration cake: One of our friends said it was everything you want in a cake: "You know how you're eating cake, and you really wish you had ice cream? And then a cookie just sounds really good?" And one of our other friends' little guy did a happy dance during all of dessert. Oh yeah, this one was a hit!

Sunday, March 11, 2012

Rich lemon curd frozen yogurt


Pucker up! It's another virtual blog party, this one hosted by my friend Di with the spring theme of Citrus Sunday.

Ever since I first made the amazingly-easy instant lemon curd posted by KAF, I really wanted to make lemon curd ice cream, which we enjoyed multiple times last summer. But I also had a carton of plain yogurt in the fridge, so I began searching my ice cream books for a lemon frozen yogurt recipe. I found one in Jeni's book: she uses a lemon syrup for hers; I subbed in a tiny batch of instant lemon curd instead.

The result is an incredibly thick and creamy frozen yogurt with a prominent lemon flavor, definitely a new favorite here. This recipe uses both cream and milk with the yogurt, so it's much richer than our usual frozen yogurt which only includes strawberries and yogurt (and therefore probably not quite as healthy). :) But oh man, is it lemony-delicious!!!

Rich lemon curd frozen yogurt
lemon curd adapted from King Arthur Flour 
frozen yogurt adapted from Jeni's Splendid Ice Creams at Home

for the lemon curd
30 g (1/2 large) egg
60 g (1/4 c) sugar
30 g (1 oz) unsalted butter, melted
60 g (1/4 c) freshly-squeezed lemon juice (from 1 large lemon)
zest of 1/2 a lemon**

for the frozen yogurt
275 g (1 1/4 c) drained plain yogurt*
375 g (1 1/2 c) 2% milk
125 g (1/2 c) heavy cream
130 g (2/3 c) sugar
44 g (1/4 c) light corn syrup
zest of 1/2 - 1 lemon**
22 g (2 T) cornstarch
35 g (2 T) 2% milk
50 g (4 T) cream cheese, softened
55 g lemon curd*** (recipe above)

1. For the lemon curd, whisk the egg and sugar together in a medium microwave-safe bowl. Whisk in the melted butter and then the lemon juice and zest. Microwave on high in one-minute increments, stirring well after each minute, until the lemon curd is slightly mounded and coats the back of a spoon (it takes 3 minutes for me).

2. For the frozen yogurt, combine the milk, cream, sugar, corn syrup, and lemon zest in a large saucepan. Bring to a boil over medium-high heat. Boil for four minutes. Turn off heat.

3. In a small bowl, whisk the cornstarch with the 35 g milk. Add cornstarch mixture to the saucepan, and return to boil, stirring constantly with a heat-proof spatula, for one minute.

4. In a large bowl, whisk the cream cheese until smooth. Slowly add the hot milk mixture, whisking vigorously until all of the cream cheese lumps are gone.

5. Whisk in the drained yogurt and the lemon curd. Chill and then proceed according to the directions of your ice cream maker.

Notes:
*To drain the yogurt, Jeni instructs you to use a quart container of plain yogurt. Cover a sieve with a couple layers of cheesecloth and set it in a strainer over a bowl. Pour the yogurt into the sieve, cover with plastic wrap, and let it sit overnight in your fridge. I never plan ahead that well. My process of draining yogurt is a little messier, but much more quick. I dump my yogurt (I used 682 g, about 2/3 of a container) into a clean, white, floursack towel. I wrap it up and squeeze the towel over the sink, which gets rid of all the liquid. Then I open the towel on the counter and scrape out the drained yogurt.
**If you don't like the texture of the zest, you can leave it out of the lemon curd and/or strain it out of the ice cream base.
***The second time I made this, I just used all of the mini-batch of lemon curd (about 75 grams); I couldn't tell a difference.

Check out Di's post for the other great citrus links!

Sunday, December 4, 2011

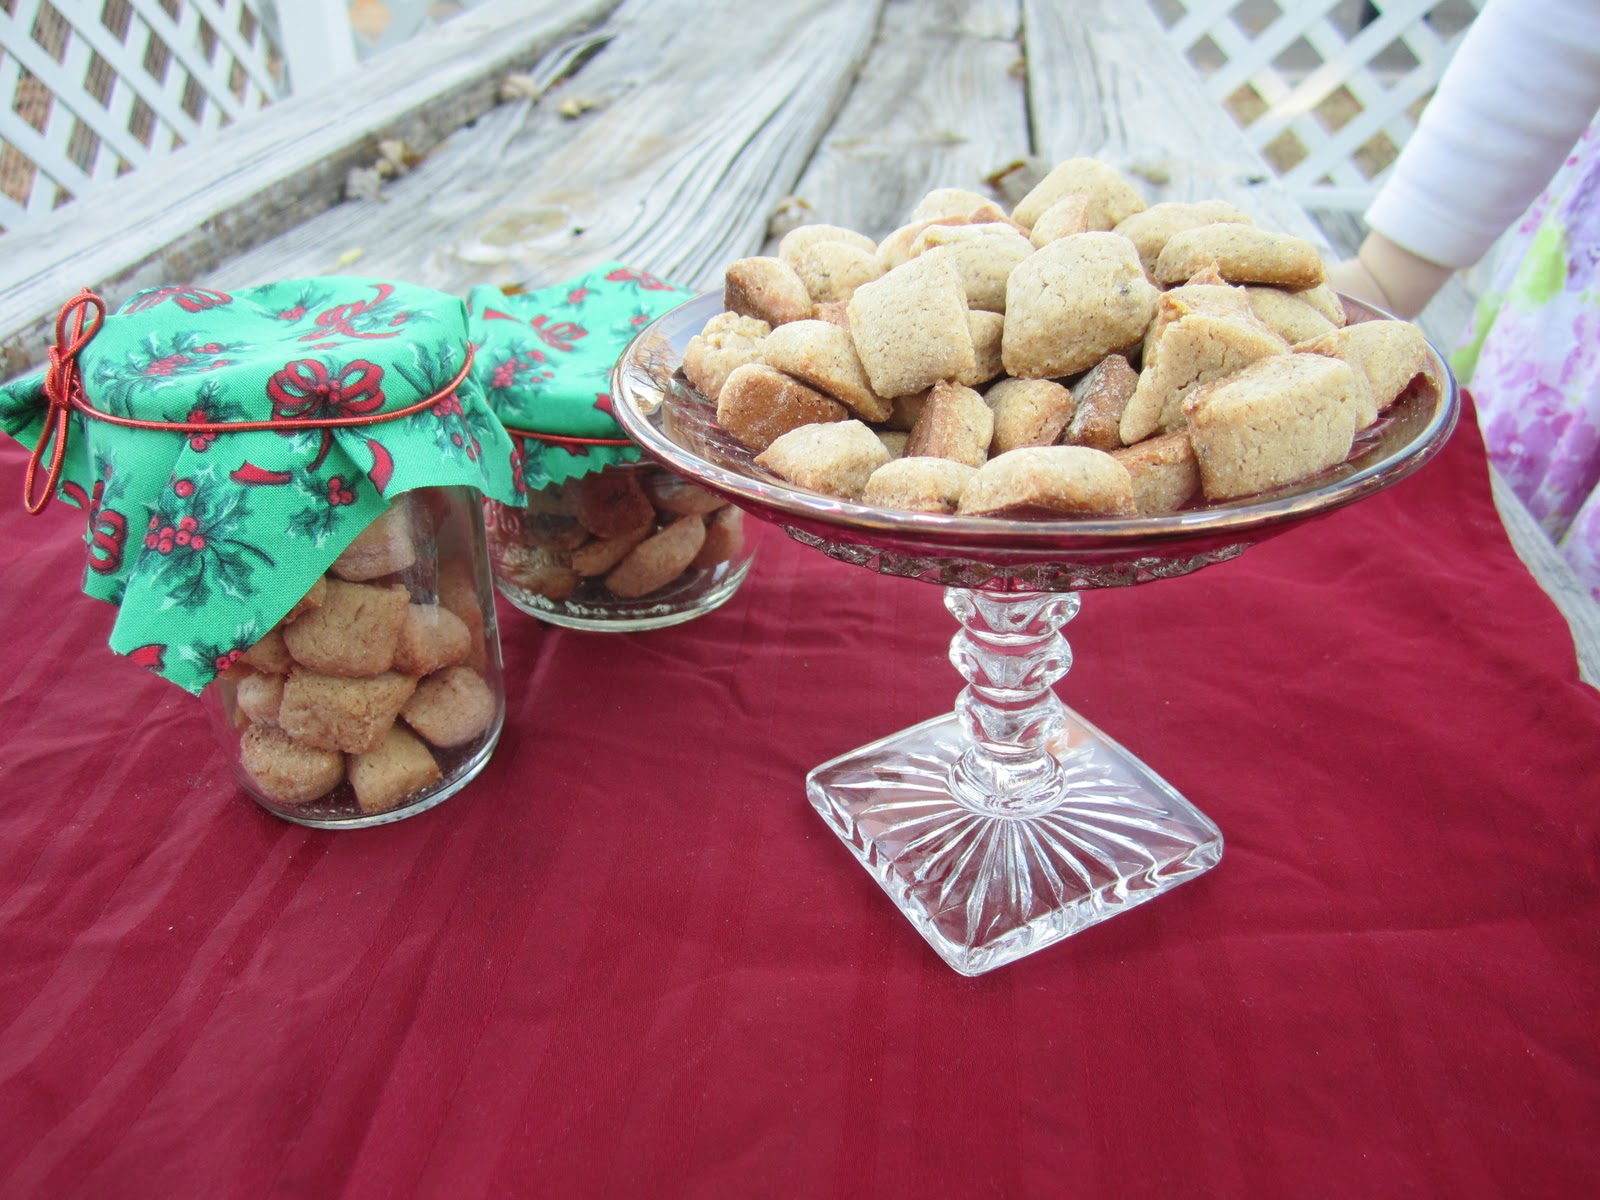
Peppernuts! (cookie exchange)

I did try to get a picture without my little assistant's hand in it,
but it was impossible, so I gave up. :)

I've been enjoying all of the virtual meals and exchanges going on lately; the round-ups are an excellent source of new cooking/baking ideas! So when Di invited me to participate in this year's virtual cookie exchange, it was a no-brainer...the only problem was deciding what to bake.

My mother-in-law is the queen of Christmas cookie baking. When we used to spend Christmas with my in-laws in Montana (before having kids negated the idea of driving the treacherous mountain passes in the winter), hubby and I would trip over each other to be the first to get to the treat shelf. The treat shelf includes tins, baggies, and boxes of heath bars, cinnamon candy, crescent cookies, fudge, beef jerky, peppernuts, pizzelles, chocolate chip cookies, peanut blossoms, sugar cookies...all homemade.

Hubby's favorite cookies in the world are his mom's crescent cookies, so I thought briefly of making those. But he looks forward to that package more than anything each year, and somehow it seems wrong to make them here. :) So then I thought of one of my favorites: peppernuts. I'd never had peppernuts before meeting my in-laws, but I was immediately drawn to the crunchy, spicy little cookies. Hubby and I always took a big baggie of them with us on the drive home, and when the curvy roads would make me a little sick, they were the only thing I could eat. Did you know that ginger is a great remedy for an upset tummy?

My mother-in-law is one of those "by feel" bakers, telling me to add stuff until it looks a certain way or "to taste" (which was so hard for me before I became more confident in the kitchen!). I'm including weights and measures for what I used, but for the flour, you really have to just keep adding it until the batter is stiff enough to roll/shape into ropes. The only other change I made to the recipe was to use unsalted butter in place of shortening.

Anita's Peppernuts
makes about 560 bite-sized cookies

2 c (400g) sugar
1 c (226g) unsalted butter, softened
2 eggs (100g)
2/3 c (160g) sour cream
2/3 c (160g) brown sugar
2 tsp (10g) anise extract
1 1/2 tsp (4g) ground cloves
1 T (6g) ground cinnamon
1 1/2 tsp (3g) ground ginger
1 1/2 tsp (3g) ground allspice
1/2 tsp ground pepper
2 2/3+ c (335g - 600g) all-purpose flour

1. Preheat the oven to 400ยบ.

2. Cream the sugar and butter in a mixer.

3. Add the eggs, sour cream, brown sugar, and extract, and mix to combine.

4. In a small bowl, whisk together the flour and the spices.

5. Add the flour mix to the wet ingredients and stir to combine. You may need to adjust the flour to get a stiff dough. (My MIL's initial recipe called to start with 2 2/3 c flour, which weighed about 335g; I ended up using about 560g of flour, and my dough was still rather sticky.) Some recipes I saw called for chilling the dough before rolling it out. I tried it both ways (rolling right away and chilling for a while) and didn't notice a difference; then I chilled the dough overnight and they were much easier to roll the next day.

6. Take a small portion of dough and roll/pinch it into a rope about 1/2" thick. Using a knife or bench scraper, cut the rope into really small pieces (1/2" long). Fill up a baking pan; these don't rise, so feel free to stick them close together.

7. Bake the trays for 10-11 minutes or until cookies are lightly golden. (You have to experiment with the texture you like; 12 minutes will make a really crunchy cookie. Hubby and I both prefer them crunchy on the outside but a little soft on the inside, so 11 minutes was about perfect for us. The batch that chilled in the fridge overnight took closer to 13 minutes.)

8. Let cool for a couple of minutes on the tray, and then use a spatula to transfer them to a bowl.

These cookies will last for quite a while, stored in an airtight container. You can also freeze them.


Be sure to check out Di's site later this week for the round-up of all of the delicious cookies people baked!


Sunday, October 16, 2011

Handmade loaves: Berne Brot Winston knot


My friend Di, host of the most excellent Virtual Cookie Exchange last winter and Sundae Sunday this past summer, decided that now that the weather is finally cooling off, it's time to bake bread! Her autumn event is dedicated to handmade loaves.

My first Mellow Bakers bread for October is Berne Brot, a Swiss challah-like braided bread. Unlike challah, Berne Brot uses butter and milk. This is a quick one-day bread; I started mixing the ingredients when I got home from work and baked the bread before bed. I couldn't decide on the type of braid to use, and almost went with a simple three or four strand braid. But as I was paging through the Bread chapter on braiding, I re-encountered the Winston Knot, a braid I had tried with challah...unsuccessfully. My biggest problem back then was that I didn't roll the strands long enough, so I ran out of dough before I was through.

This time, I followed the wonderfully clear instructions Celia offers in her Winston Knot tutorial...and it worked! Hurrah!


I made a half recipe, which made about 840 grams of dough; six balls of 140 g, rolled out to about 60 - 65 cm (24" or 25"). I tried to err on the side of too-long, so that I wouldn't run out like last time. My dough was a lot softer than challah; in his braiding section, JH suggests dusting the braid strands with the tiniest, lightest dusting of flour to help prevent softer dough strands from baking into each other; it seemed to work.

The taste was similar to challah or a less-buttery brioche, so as we always do with both of those, we made French toast.


Berne Brot
adapted from Jeffrey Hammelman's Bread

425 g bread flour
30 g vital wheat gluten
204 g milk, warmed
1 egg yolk
1 egg
61 g unsalted butter, softened
26 g sugar
9 g salt
3 g instant yeast

1. Stir together the flour, vital wheat gluten, and salt in a large mixing bowl. Whisk the yeast into the warmed milk, and then stir the milk, eggs, and butter into the dry ingredients. Stir (I used my dough whisk) until it all comes together in a large, shaggy mass.
2. Knead in a stand mixer or by hand for 3 or 4 minutes, until the dough has developed.
3. Place dough in a lightly oiled bowl, cover with plastic wrap, and let rise for an hour. Stretch and fold the dough, recover the bowl, and let rise for another hour.
4. Split the dough into equal-sized balls, cover with plastic wrap, and let rest for 15 minutes. Then roll each ball into a long strand and proceed with braiding. If you're interested in trying the winston knot, I strongly recommend checking out Celia's tutorial.
5. Place the braid on a baking sheet lined with parchment paper or a silicone baking mat. Cover with baker's linen and plastic wrap. Let rise for 1 1/2 to 2 hours. (JH warns against letting the braid rise fully before baking; he recommends letting it rise to about 85%.)
6. Thoroughly brush the loaf with an egg wash.
7. Bake at 375ยบ for 35 minutes, or until the internal temperature reaches 200ยบ.
8. Cool on a rack.

Head over to Di's blog later this week to see the handmade loaf round-up!


Sunday, October 9, 2011

Pumpkin dinner: Pumpkin muffins


We've had such intense seasons over the past year: the coldest, snowiest winter in ages, followed immediately by weeks of blisteringly hot, humid summer, and now, all of a sudden, it's over: the leaves are changing, the furnace is running, and the squashes are overwhelming the CSA box. (Actually, although the furnace was running when I first wrote this, today we are experiencing record high temperatures, perfect weather for ice cream. Our weather is so bizarre!)


Happily, right after we got our first pumpkins in our CSA box, I got an invite from Phyl to participate in a virtual pumpkin dinner. There wasn't a lot of debate about what to make; the second my kids saw the pumpkins, they both yelled, "Pumpkin muffins!!!"

We have a favorite family recipe, based on a recipe that one of hubby's oldest friends gave us when we got married. This is the first time I've used fresh pumpkin, though.

I took two pumpkin-like squashes (our CSA grows many heirloom varieties, so I'm not always exactly sure which kinds we've gotten), cut them in half, and roasted them on a foil-covered pan in a 350ยบ oven for about an hour. The skins slid off easily after roasting. Then I processed them in my food processor until they were smooth. I had a cup of puree to use for our muffins, plus another three cups to freeze for future pumpkin adventures.


The next morning, the kids and I got to work!


Julie's pumpkin muffins with cream cheese frosting
made 6 regular muffins + 20 mini-muffins

 for the muffins
2 c (260 g) all-purpose flour
1 c (220 g) packed light brown sugar
1 tbsp (10 g) baking powder
1 tsp (3 g) ground cinnamon
1/4 tsp salt
1/4 tsp baking soda
1/4 tsp freshly ground nutmeg
1/8 tsp ground cloves
1 c (200 g) pumpkin puree
1/2 c (125 g) milk
2 eggs
1/3 c (75 g) unsalted butter, softened

for the frosting (adapted from ATK's Family Cookbook)
2 1/2 oz (30 g) unsalted butter, softened
4 oz (110 g) cream cheese, softened
1/2 tbsp (8 g) sour cream
1/2 tsp (4 g) vanilla extract
5/8 c (80 g) confectioner's sugar

for the muffins
1. Preheat oven to 350ยบ.
2. Whisk 1 c (130 g) of the flour with the brown sugar, baking powder, cinnamon, baking soda, nutmeg, and cloves in a large mixing bowl.
3. Add the pumpkin puree, milk, eggs, and butter. Beat on low until blended.
4. Beat on medium speed for 2 minutes.
5. Add the other 1 c (130 g) of flour and mix on low until blended.
6. Spoon into greased (or papered!) muffin cups.
7. Bake regular muffins for 25 minutes, mini muffins for 16 minutes, or until a toothpick inserted in the middle comes out with just a few crumbs attached.
8. Cool in the pan for 5 minutes and then move muffins to a cooling rack.

for the frosting
1. Process the butter, cream cheese, sour cream, and vanilla in a food processor until combined, about 30 seconds.
2. Add the confectioner's sugar and process until smooth, about 10 more seconds.


Check here for the complete pumpkin dinner round-up. I have been on a pumpkin roll (pun intended) lately: pumpkin ice cream, pumpkin knotted dinner rolls, pumpkin seafood curry. And with six more small CSA pumpkins waiting, there will be more to come! :)

Sunday, July 24, 2011

Chocolate pudding pops!


Happy Sundae Sunday! My friend Di is hosting a virtual ice cream social today, similar to the cookie exchange she hosted last winter, to celebrate July being National Ice Cream Month.

I only recently purchased an ice cream maker, and while I've been using it a ton, I've gotten many of my recipes from other bloggers who are attending the social. My challenge: finding a recipe that someone in the group hadn't already posted. At first, I made a strawberry cheesecake light ice cream, which was pretty tasty. But I was desperately craving chocolate.... I read up on all sorts of unusual chocolate ice creams: ones with cayenne, coffee, cherries. But I was really in the mood for chocolate-chocolate.

And then I remembered my most recent issue of Cooking Light and a recipe for chocolate pudding pops. Score!

These taste exactly like the chocolate pudding pops we grew up with: a perfect tasty treat for a 95ยบ afternoon!

Chocolate pudding pops
adapted from Cooking Light

590 mL (2 1/2 cups) 2% milk 
110 g (1/2 cup) sugar
50 g (1/2 cup) unsweetened cocoa, sifted
10 g (1 tbsp) cornstarch
pinch of salt
20-25 g egg yolk (from 1 egg)
4 g (1/2 tsp) vanilla extract
59 g (2 ounces) semisweet chocolate, cut into small chunks

1. Combine the milk, sugar, cocoa, cornstarch, salt, and egg yolk in a medium saucepan. Whisk continuously over medium heat for 8 minutes, or until the mixture is bubbling and has slightly thickened.
2. Off heat, add chocolate. Let rest 1 minute and then whisk in. Add vanilla.
3. Pour mixture into a bowl set inside a larger bowl filled with ice water. Stir occasionally until cooled.
4. Use a measuring cup with a spout, pour into popsicle molds and insert sticks. (Mine made 8 popsicles.)
5. Freeze completely.


Check here for the round-up of all of the Sundae Sunday tasty treats!

Monday, December 13, 2010

Virtual Cookie Exchange: Chocolate-Peppermint Sandwiches

Really, there's a picnic table under there! Can you see it?

Di, over at the lovely Di's Kitchen Notebook, offered to host a virtual cookie exchange this year with Kayte, Phyl, and several others who routinely do "Twitterbakes" together.

Stuck under 17 inches of snow (some are calling it Snowmaggedon or Snowpocolypse here) and therefore unexpectedly home on a Saturday afternoon, I jumped onto the baking bandwagon, along with Andrea. This was my first time joining in a Twitterbake ~ where a group of bakers bake the same, or a similar, recipe and tweet about their process ~ and it was great fun!

The recipe I chose was chocolate-peppermint sandwiches from the newest issue of Cook's Country, a finalist from their reader Christmas cookie contest.


I was initially concerned that I'd overbaked the cookies, but they ended up being perfectly chewy. The recipe calls for basic semi-sweet chocolate chips, which is what I used, but I'm intrigued with the thought of experimenting with a higher quality darker chocolate. The other change I'm planning to make next time (and there will be a next time!) is to use a smaller scoop. The recipe calls for a tablespoon of dough for each cookie; this made cookies that were way too big for my little ones. I think I will use a teaspoon next time.

I had some challenges with the frosting. It was too runny, not very pepperminty, and there was only enough to fill about half of the cookie sandwiches. I made several changes, which are indicated below.

The sandwich cookies were chocolately but not too sweet, and were tasty by themselves. But with the addition of the pepperminty frosting, they were just amazing!
 
Chocolate-Peppermint Sandwich Cookies
adapted from Cook's Country

For the cookie dough:
1 1/2 cups all-purpose flour
3/4 tsp baking soda
1/2 tsp salt
1 cup semi-sweet chocolate chips
3/4 cup packed light brown sugar
5 tbsp unsalted butter
1 tbsp water
1 egg

For the frosting:
3 tsp milk
3 tbsp unsalted butter, melted
1/4 tsp peppermint extract
3/4 cup confectioners' sugar, sifted
2 drops of red or green food coloring (optional)

For the cookies:
1. Preheat oven to 350F with racks in the upper-middle and lower-middle positions
2. Line 2 cookie sheets with parchment paper
3. Combine flour, baking soda, and salt in a medium bowl
4. Heat butter, chocolate, brown sugar, and water in medium saucepan over medium heat, stirring until smooth. (I used frozen butter, so I heated it on low heat for a bit by itself until it began to melt.)
5. Transfer to large bowl and beat in the egg.
6. Stir in flour mixture until just combined.
7. Place 1 tbsp (I'll use a teaspoon next time) dough on the baking sheets. Bake cookies until puffed and edges are smooth, about 10 minutes (I baked them for 11 or 12). Cool 5 minutes on sheets and then transfer to a wire rack.

For the filling:
1. Whisk melted butter, milk, and extract in medium bowl until combined. (Check peppermint flavor; the recipe calls for 1/8 tsp, but I couldn't taste the peppermint at all.) Add sifted sugar and mix until smooth. Then add food coloring, if desired. (I split mine into two batches and colored one red and one green.)
2. Spread 2 tsp filling over bottom of cookie (the recipe calls for 1 tsp, but that wasn't nearly enough to taste it between two cookies; 1 tsp might be enough for smaller cookies) and then top with remaining cookie.
(The recipe says that sandwiches can be refrigerated in airtight container for 2 days, but ours didn't make it that long.)

Thanks for hosting, Di! It was so much fun! (Check Di's post later this week for a round-up of all the fun cookies people baked!)