About a year ago, Nancy suggested that a bunch of us Twitter pals liven up our avatars by choosing a chef-of-the-month, cooking one of his or her recipes, and using a picture of the dish as our avatar for the month. I have had such great fun exploring many new-to-me chefs and trying out different styles of meals!
Our December chef was Jamie Oliver, and he was actually chosen by a group vote. Although I've heard a bunch about JO, I'd never actually tried one of his recipes. I spent a bunch of time browsing on his site, and actually enjoyed reading the articles as much as perusing the recipes. I love his commitment to teaching kids about nutrition and how to prepare their own healthy foods ~ especially as someone who witnesses the nutritional habits of teens on a daily basis!
Life has been a bit hectic these days, so (as seems to be usual for me), I choose a recipe for a good dinner rather than picking something that would make a good avatar picture. Ever the practical one, that's me! :) I picked Jamie's chicken tikka masala (recipe here). The dish took about an hour and a half to prepare (which includes a 30 minute marinade of the chicken) and smelled absolutely delicious. It made a nice dinner, but I have to say that we much prefer a similar recipe that I've been making for the past couple of years: chicken with curried tomato almond sauce (found on the Daring Cooks website). That recipe contains cinnamon and peas, both of which lend the dish just a hint of sweetness that was missing tonight. Still, we all enjoyed dinner and I look forward to trying more JO recipes!
And now, the recap:
January: Thomas Keller's caramel corn
February: James Beard's snickerdoodle pear cake (a quick and easy favorite!)
March: Emeril's cheese crackers
April: Jaques Pepin's ricotta dumplings
May: David Chang's steak lettuce wraps
June: Eric Reipert's shrimp and rice pilaf
July: Ina's barbecue sauce and mashed potatoes (a big hit, especially on bbq pizza!)
August: Rick Bayless' shredded chicken with potatoes and tomatoes (we loved it!)
September: Nigella's pumpkin seafood curry
October: Mark Bittman's banana chocoalte-chip pancakes (now in the dinner rotation!)
November: Ghillie Basan's veggie tagine
December: Jamie Oliver's tikka masala
Monday, December 19, 2011
Saturday, December 17, 2011
Sour cream brownies (Modern Baker)
My bookclub enjoyed the brownies paired with homemade marshmallows.
My fourth Nick Malgieri brownie recipe is another from the cookies & bars section of The Modern Baker. This one is made with technique similar to the others (truffle, Florida, and cocoa nib), but includes the addition of sour cream and walnuts. I knew that most of the people I was baking for (my kiddos and my debaters) wouldn't eat the nut version, so I actually made the recipe walnut-free and then stirred walnuts into the batter in one corner of the pan.
For all of the other brownie recipes, the 30 minute cooking time seemed perfect (even when I only made a half-recipe in an 8x8 pan), but for this one, I wondered if they might have been slightly over-baked. The toothpick test came out mostly clean. Nevertheless, these were a big hit with the kids, hubby, friends, and students. The one brownie I sampled okay; these were definitely my least favorite of his brownies...not that that's saying much, since the rest are so out-of-this-world fantastic!
Friday, December 16, 2011
Homemade marshmallows
Homemade marshmallows have been on my to-do list for a long time. I've bookmarked several recipes: one from Deb at Smitten Kitchen, one from David Leibovitz, one from Alton Brown, and most recently, one from King Arthur Flour. Whenever I'm bored, I start reading the recipes and all of the comments and think, "I really have to try these soon!" And then I get too overwhelmed at the prospect of all that mess.
The AB and KAF ones simply use sugar, corn syrup, salt, cold water, and gelatine. The ones Deb and DL posted both use egg whites. All four have pretty terrific reviews. In the interest of ease (and because I was inspired to start the process when it was nearly bedtime), I decided to go the non-egg white route, although I ended up bouncing back and forth between the four sites, using tidbits of advice from each. I started the process at about 8:30 and the marshmallows were ready to dry in their pan by 9:15, so really, it was easier than I expected.
I started by pouring cold water over gelatine in my stand mixer bowl. Then I boiled sugar, corn syrup, salt, and water until the sugar dissolved, and left it to boil untouched until it reached 238º on my instant thermometer (I actually tested my thermometer for the first time, and learned that my water boils at 210º).
Then I started my mixer on low and slowly slowly slowly drizzled the hot sugar down the side of the bowl. I increased the mixer's speed to 8 and mixed until the marshmallow was lukewarm (about 8 minutes). Thanks to Deb's warning not to touch anything! I resisted the urge to scrape the bowl and, I believe, saved myself the headache of the marshmallows sticking to everything in sight.
Finally, I used an oil-coated rubber spatula to spread it into my prepared pan, a 9x13 pan coated with a little coconut oil and then dusted with a confectioner's sugar/cornstarch mixture. I sifted some more sugar/cornstarch over the top and left the pan to sit overnight.
Today, I pulled the marshmallow slab out of the pan and put it onto a cutting board, and then used oil-coated scissors to cut it into pieces. I tried using a mini-cookie cutter to make fun shapes, but it was way too sticky. So the kids each made heart-shaped marshmallow and then I went back to cutting with the scissors. After cutting, I threw the cubes into a bowl of confectioner's sugar, stirred them to coat, and then set them in a strainer to shake off the excess sugar.
I can't believe I waited so long! These were a huge hit with the kiddos and the hubby; I'm not a huge marshmallow fan like they are, but even I couldn't resist grabbing a fluffy bite every time I walked past the pan. Next up, the egg white version!
Wednesday, December 14, 2011
Three-way gingersnaps (Modern Baker)
Several of my Twitter pals were baking together from The Modern Baker this past weekend. I really wanted to join in and make the three-way gingersnaps, but a debate tournament and a family trip to the science museum ate up my weekend and left me with no time for baking.
But those gingersnaps were calling my name, so last night, I quickly whipped up a half-batch. These are called three-way gingersnaps because they're made with three different forms of ginger: ground ginger, fresh ginger root, and chopped crystallized ginger. (I didn't find fresh ginger root when we were grocery shopping this weekend, so I used bottled minced ginger from the fridge.)
The gingersnaps also have honey instead of the traditional molasses, so they were a little lighter in color.
These were absolutely delicious. In fact, the half-batch (about 3 1/2 trays of cookies) is just about gone. My dad, who loves gingersnaps, said they may have been the best he's ever eaten. I am positive we'll be making these again...maybe even within the week! :)
Sunday, December 11, 2011
Semolina bread (Mellow Bakers)
Even after all of this time, sometimes the miracle of bread baking just gets me. Tonight, sitting at the dinner table, eating yummy winter veggie soup and pillowy fresh semolina bread, I kind of couldn't believe that the idea to have bread and soup for dinner hadn't occurred to me until 9 a.m. this morning!
When the dinner idea occurred to me, I searched my final five! remaining Mellow Bakers for a nice one-day recipe; there was one left: semolina (duram) bread. There was also an option with a whole-grain soaker, but the kids aren't been fans of seeds, so I went with the simpler version.
I made the sponge out of duram flour, bread flour, warm water, yeast, and sugar. I let it rise for a little over an hour, and then combined it with the rest of the duram flour, bread flour, water, and some salt and olive oil. The dough was given one fold half-way through the bulk fermentation. Inspired by the BBA pane siciliano, I shaped this into a long baguette and then curled it into an S.
We loved it! The bread was soft and pillowy with an excellent flavor; it paired beautifully with the soup.
Sunday, December 4, 2011
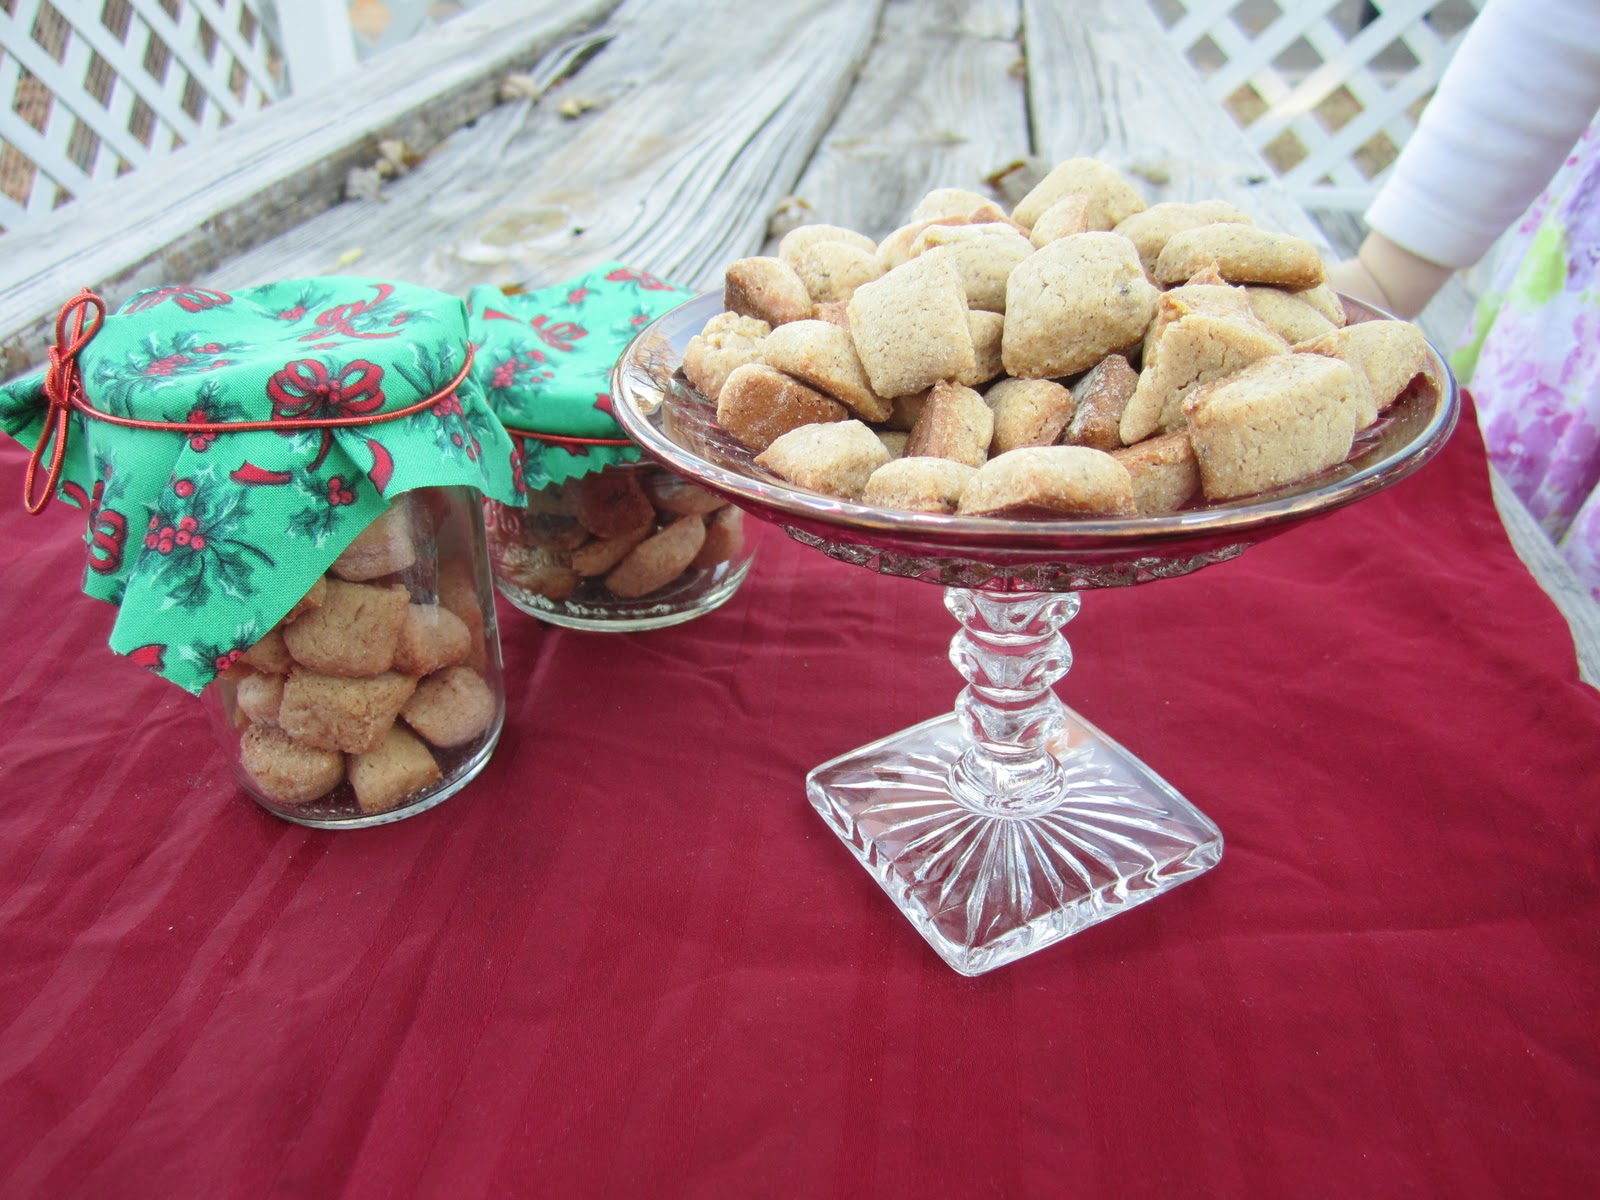
Peppernuts! (cookie exchange)
I did try to get a picture without my little assistant's hand in it,
but it was impossible, so I gave up. :)
I've been enjoying all of the virtual meals and exchanges going on lately; the round-ups are an excellent source of new cooking/baking ideas! So when Di invited me to participate in this year's virtual cookie exchange, it was a no-brainer...the only problem was deciding what to bake.
My mother-in-law is the queen of Christmas cookie baking. When we used to spend Christmas with my in-laws in Montana (before having kids negated the idea of driving the treacherous mountain passes in the winter), hubby and I would trip over each other to be the first to get to the treat shelf. The treat shelf includes tins, baggies, and boxes of heath bars, cinnamon candy, crescent cookies, fudge, beef jerky, peppernuts, pizzelles, chocolate chip cookies, peanut blossoms, sugar cookies...all homemade.
Hubby's favorite cookies in the world are his mom's crescent cookies, so I thought briefly of making those. But he looks forward to that package more than anything each year, and somehow it seems wrong to make them here. :) So then I thought of one of my favorites: peppernuts. I'd never had peppernuts before meeting my in-laws, but I was immediately drawn to the crunchy, spicy little cookies. Hubby and I always took a big baggie of them with us on the drive home, and when the curvy roads would make me a little sick, they were the only thing I could eat. Did you know that ginger is a great remedy for an upset tummy?
My mother-in-law is one of those "by feel" bakers, telling me to add stuff until it looks a certain way or "to taste" (which was so hard for me before I became more confident in the kitchen!). I'm including weights and measures for what I used, but for the flour, you really have to just keep adding it until the batter is stiff enough to roll/shape into ropes. The only other change I made to the recipe was to use unsalted butter in place of shortening.
Anita's Peppernuts
makes about 560 bite-sized cookies
2 c (400g) sugar
1 c (226g) unsalted butter, softened
2 eggs (100g)
2/3 c (160g) sour cream
2/3 c (160g) brown sugar
2 tsp (10g) anise extract
1 1/2 tsp (4g) ground cloves
1 T (6g) ground cinnamon
1 1/2 tsp (3g) ground ginger
1 1/2 tsp (3g) ground allspice
1/2 tsp ground pepper
2 2/3+ c (335g - 600g) all-purpose flour
1. Preheat the oven to 400º.
2. Cream the sugar and butter in a mixer.
3. Add the eggs, sour cream, brown sugar, and extract, and mix to combine.
4. In a small bowl, whisk together the flour and the spices.
5. Add the flour mix to the wet ingredients and stir to combine. You may need to adjust the flour to get a stiff dough. (My MIL's initial recipe called to start with 2 2/3 c flour, which weighed about 335g; I ended up using about 560g of flour, and my dough was still rather sticky.) Some recipes I saw called for chilling the dough before rolling it out. I tried it both ways (rolling right away and chilling for a while) and didn't notice a difference; then I chilled the dough overnight and they were much easier to roll the next day.
6. Take a small portion of dough and roll/pinch it into a rope about 1/2" thick. Using a knife or bench scraper, cut the rope into really small pieces (1/2" long). Fill up a baking pan; these don't rise, so feel free to stick them close together.
7. Bake the trays for 10-11 minutes or until cookies are lightly golden. (You have to experiment with the texture you like; 12 minutes will make a really crunchy cookie. Hubby and I both prefer them crunchy on the outside but a little soft on the inside, so 11 minutes was about perfect for us. The batch that chilled in the fridge overnight took closer to 13 minutes.)
8. Let cool for a couple of minutes on the tray, and then use a spatula to transfer them to a bowl.
These cookies will last for quite a while, stored in an airtight container. You can also freeze them.
Be sure to check out Di's site later this week for the round-up of all of the delicious cookies people baked!
Saturday, December 3, 2011
Caramel crumb bars (Modern Baker)
I guess it says something that I'd already made three cookie/bar recipes from the Modern Baker Challenge by December 2nd, only two days into our first cookie month! There's just something about a good cookie recipe: quick and easy to whip up, fun to share, loved by everyone.
These caramel crumb bars were no exception, although this recipe does have a few more steps than your typical cookie or brownie recipe. Make a dough (softened butter, sugar, salt, vanilla extract, and flour), press it into a pan, and let it chill. Make the filling (butter, corn syrup, dark brown sugar, and sweetened condensed milk), and let it cool.
Then assemble: spread the filling over the dough, sprinkle with the crumb topping (just extra dough with a little bit of extra flour added until it makes a crumble) and bake. Being the confirmed chocoholic that I am, I prefer the brownie recipes, but these were a big hit with the family and my students.
Subscribe to:
Posts (Atom)